How to host Next.js app on .NET 6.0 application
How to host next.js app on net 6.0 application using SpaServices and static export.

Hi techies, this time I was working on a Next.js app using SpaServices from .NET 6.0 and got into trouble making it work so let's see how to do it properly.
TLDR;
You can check the repository that includes the .NET project hosting Next.js application ( jesulink2514/nextjs-net60 (github.com) ), look at nextjs-net60 project and review the following files for configuration changes:
nextjs-net60.csprojProgram.csClientApp/next.config.jsCientApp/package.json
Minimal Next.js sample with Dynamic Routes
In order to showcase the problem with Next.js and its routes we needed a sample, so we started creating a minimal app with some dynamic routes.
I created the base using create next-app and I chose the TypeScript variant for this sample but it works in the same way for the JavaScript version.
yarn create next-app --typescript
The main addition to the app is two simple pages that you can check:
products/index.tsx[productId].tsx
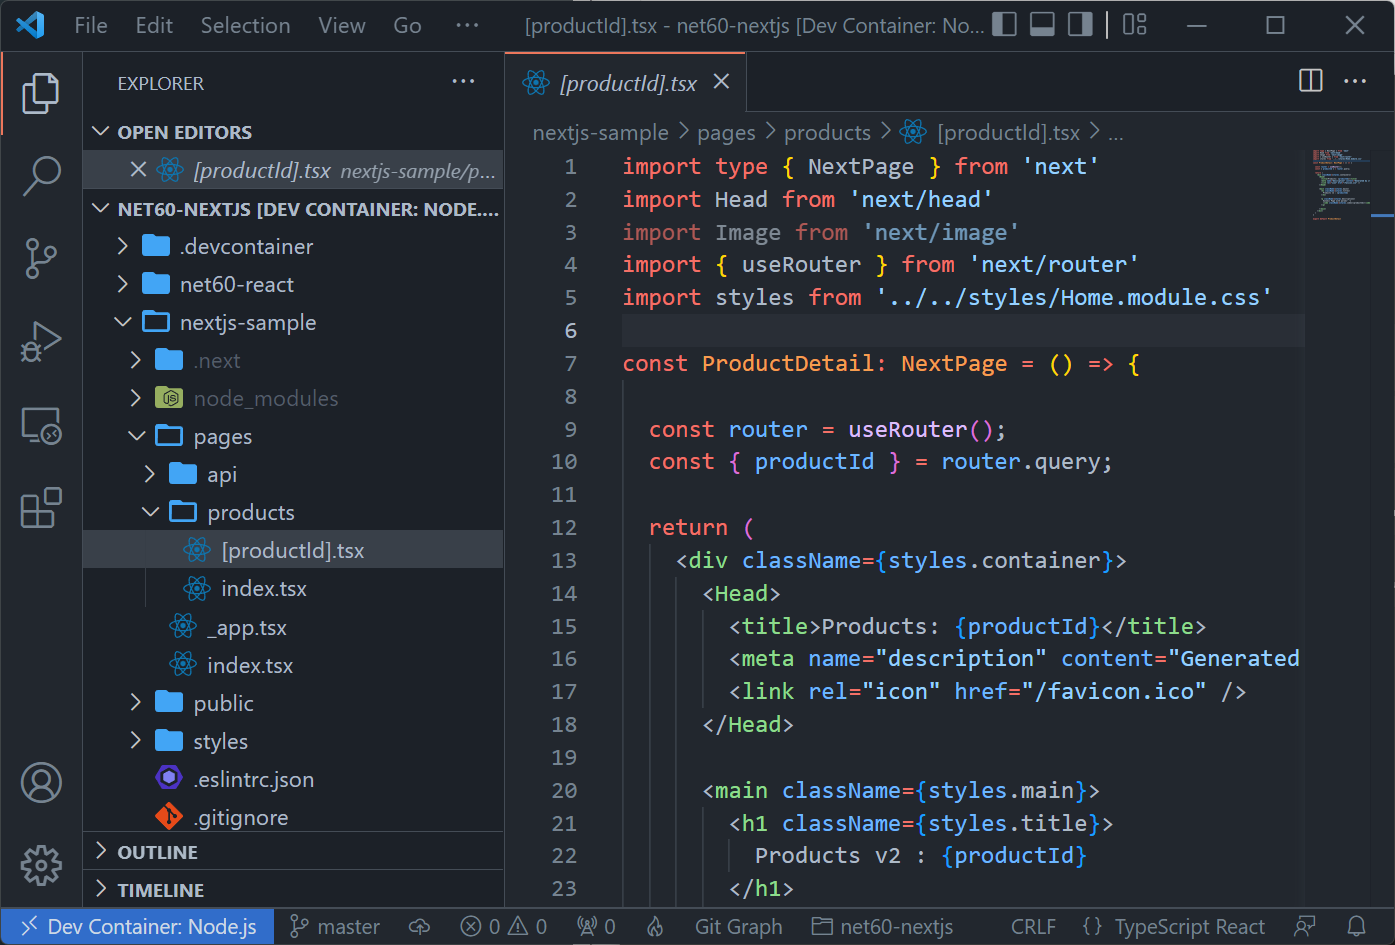
Running a yarn dev on the terminal got the app running so you can check those pages on http://localhost:3000.
http://localhost:3000/productshttp://localhost:3000/products/product-a
So, that summarizes our gol here: make those routes work during development and production as well.
Analyzing current React.js Project Template
If you are familiar with SPAServices in ASP.NET Core you will remember that a middleware (and a package) exists in ASP.NET that lets you host your APIs and your SPA Application in the same App making the whole development process easy.
So, the first idea will be checking the current React.js template for .NET 6.0 and looking at the features and configurations made there and try to port them to Next.js.
dotnet new react -o net60-react
And you get a fully functional React.js app with routing and API services hosted on the same app including Hot-reload for development experience and ready to publish.
Let's do a dotnet run and see it in action.

Now that we saw what the template gave us is time to analyze how it is done.
First, start checking the .csproj file where most of the configuration happens.
SpaRoot at line 9 tells us where the source code for our react app is and the root from where our commands will be executed, in this case ClientApp folder.
DefaultItemExcludes at line 10 just removes the node_modules folder from the project which is quite convenient for us.
SpaProxyServerUrl at line 11 is quite important because it tells the project at which url redirects on startup (dotnet run).
SpaProxyLaunchCommand at line 12 lets us execute a command to start the react.js app for development purposes. In our case we will probably change it to use yarn dev for Next.js.
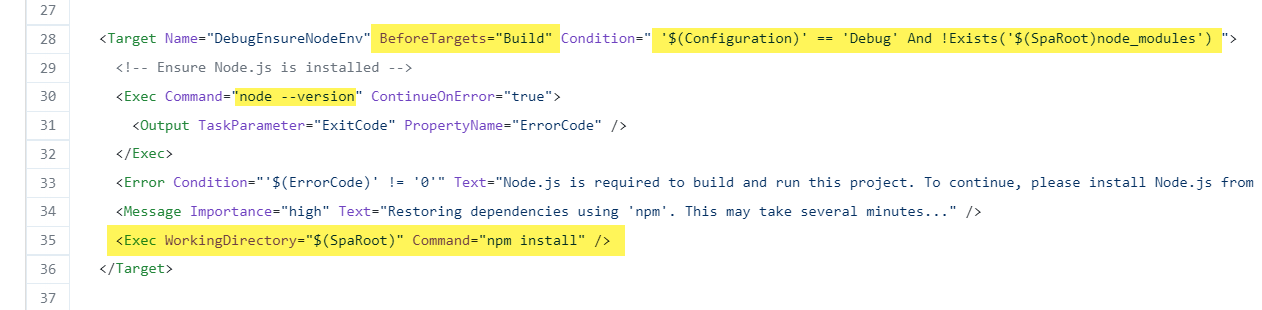
Then, you can check lines 28 to 36, that is a Target that is executed before Build when you are in Debug mode and there is no node_modules folder so no packages were restored yet. In this case we will probably tweak it a little just to work with Yarn.
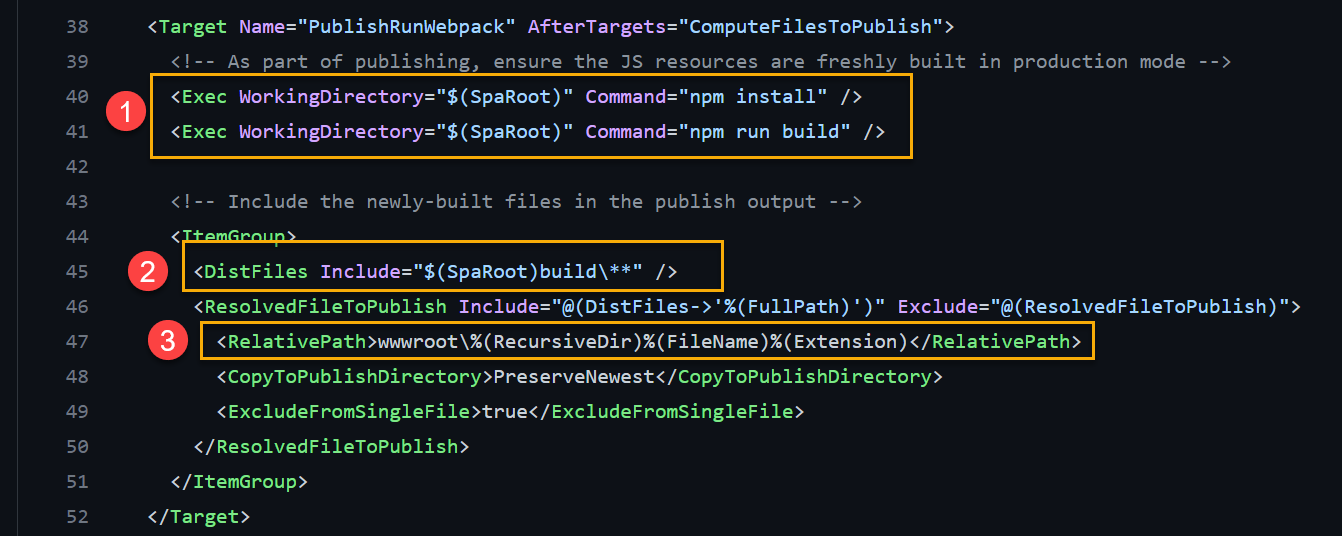
Finally, you can check at lines 38 to 52, those are the most important lines for Production deployment (dotnet publish).
- We have a couple of commands that are required to get the production version of our app,
npm installandnpm run build(tasks frompackage.json). We will probably replace them with equivalentyarntasks. - We tell .NET 6.0 where are those production ready static files, in this case for the react.js template is the
buildfolder insideClientAppfolder ($(SpaRoot)variable). - And finally, we move those production files from
DistFilesdirectory towwwrootso we can serve those files on production mode.
At this point, we looked at everything we need from the .NET side of things but there is one question that remains, how is react accessing our APIs?
The answer is ClientApp/src/setupProxy.js, that files has the configuration for a Node middleware that acts like a proxy and let react in development mode access our .NET APIs. You can check the official docs for more details.
https://create-react-app.dev/docs/proxying-api-requests-in-development/
So, we will have to figure out how to do that in Next.js too.
Applying changes to Next.js project
Ok, so far we have some ideas on how to make this Next.js thing work, so lets start putting all the pieces together.
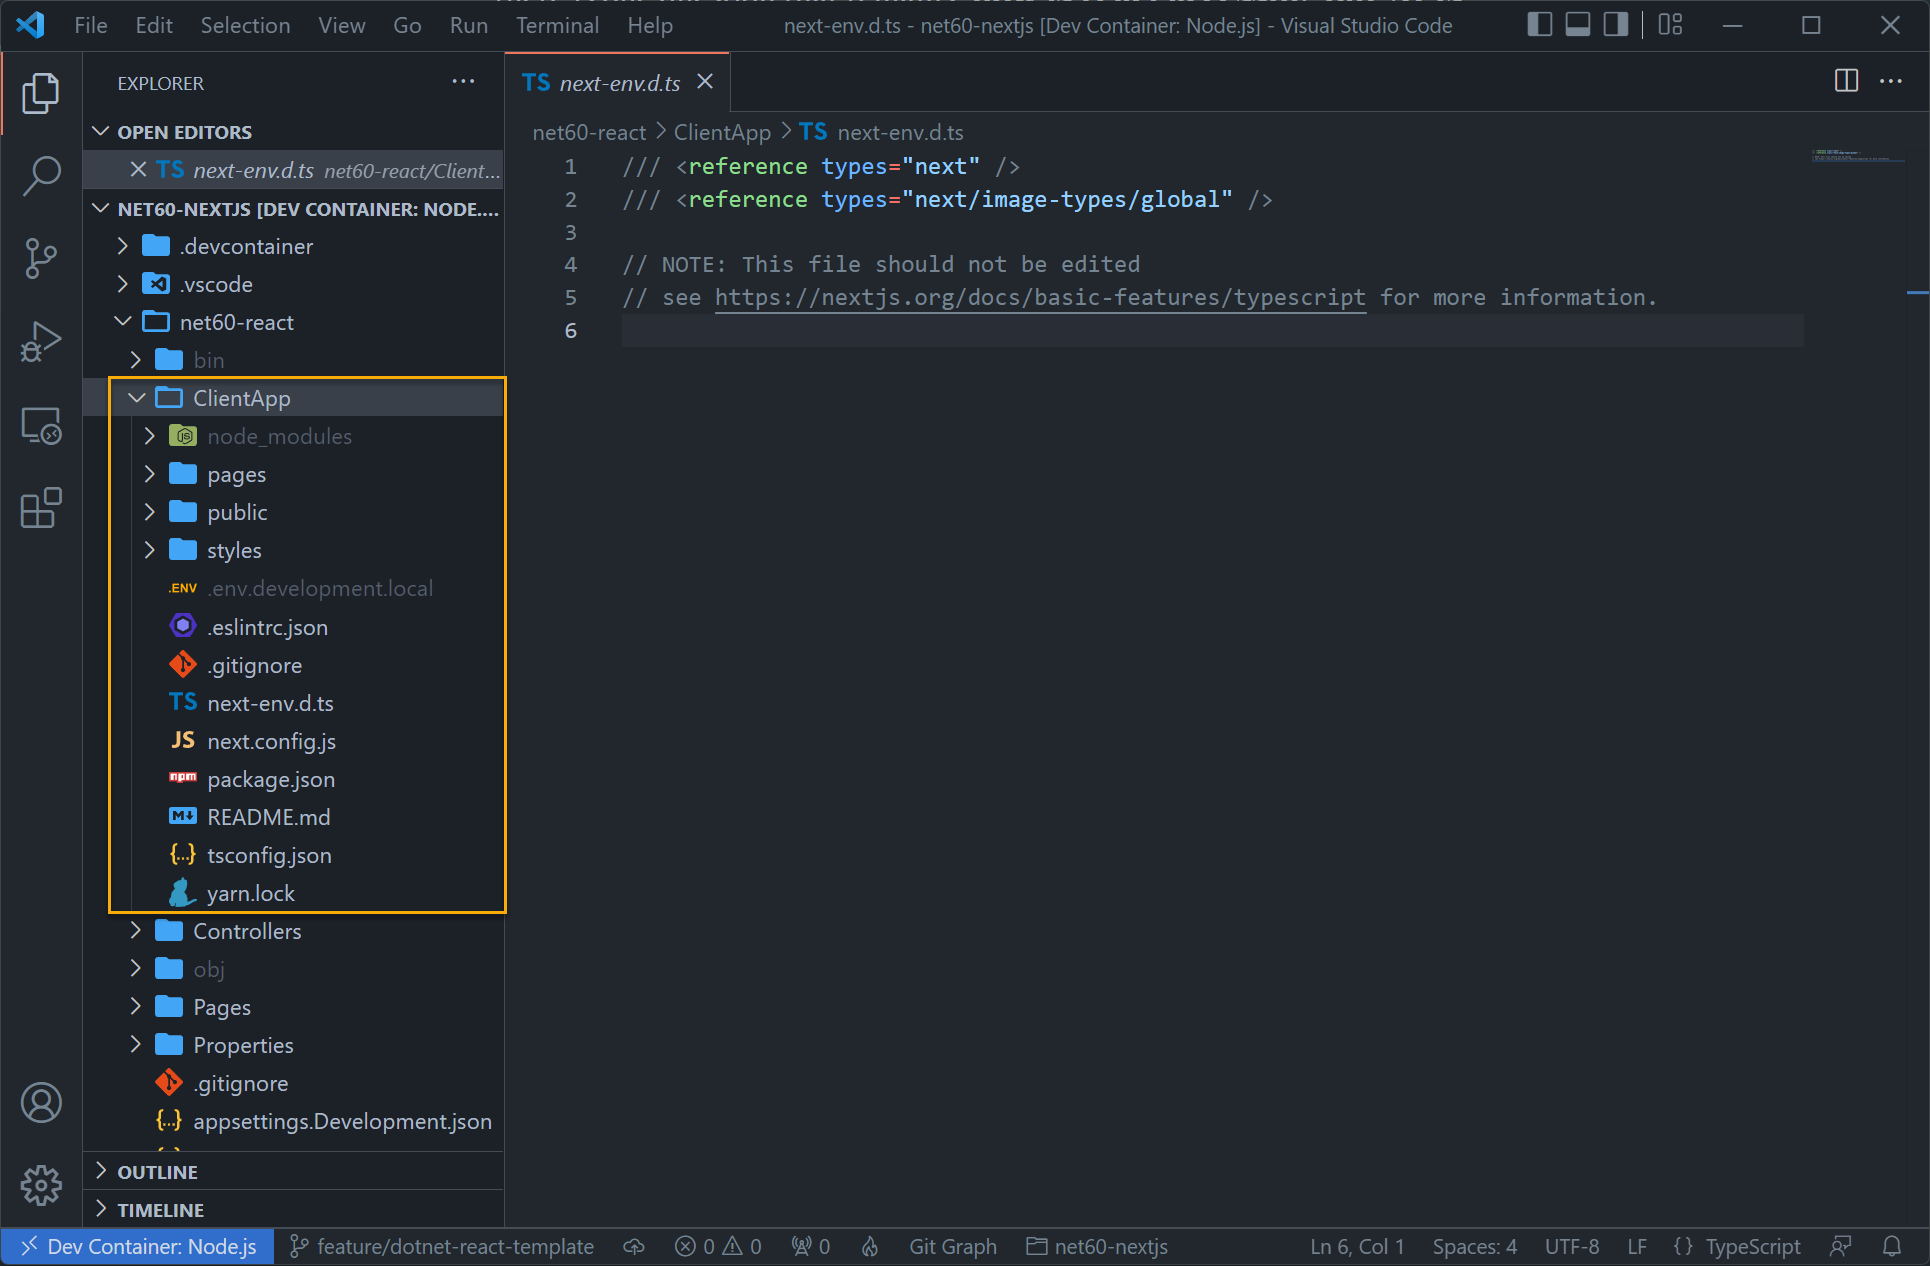
First, obviously we need to delete all files in the ClientApp folder and replace them with our Next.js source files to start implementing our setup.
Proxy to Next.js app
So, we do some changes mainly because of switching to Yarn but can check those in detail below.
- We changed our
SpaProxyServerUrltohttp://localhost:3000which is the default port and scheme for Next.js andSpaProxyLaunchCommandtoyarn dev. - We changed our target
DebugEnsureNodeEnvto useyarn. - But most important, at line 45 we changed our
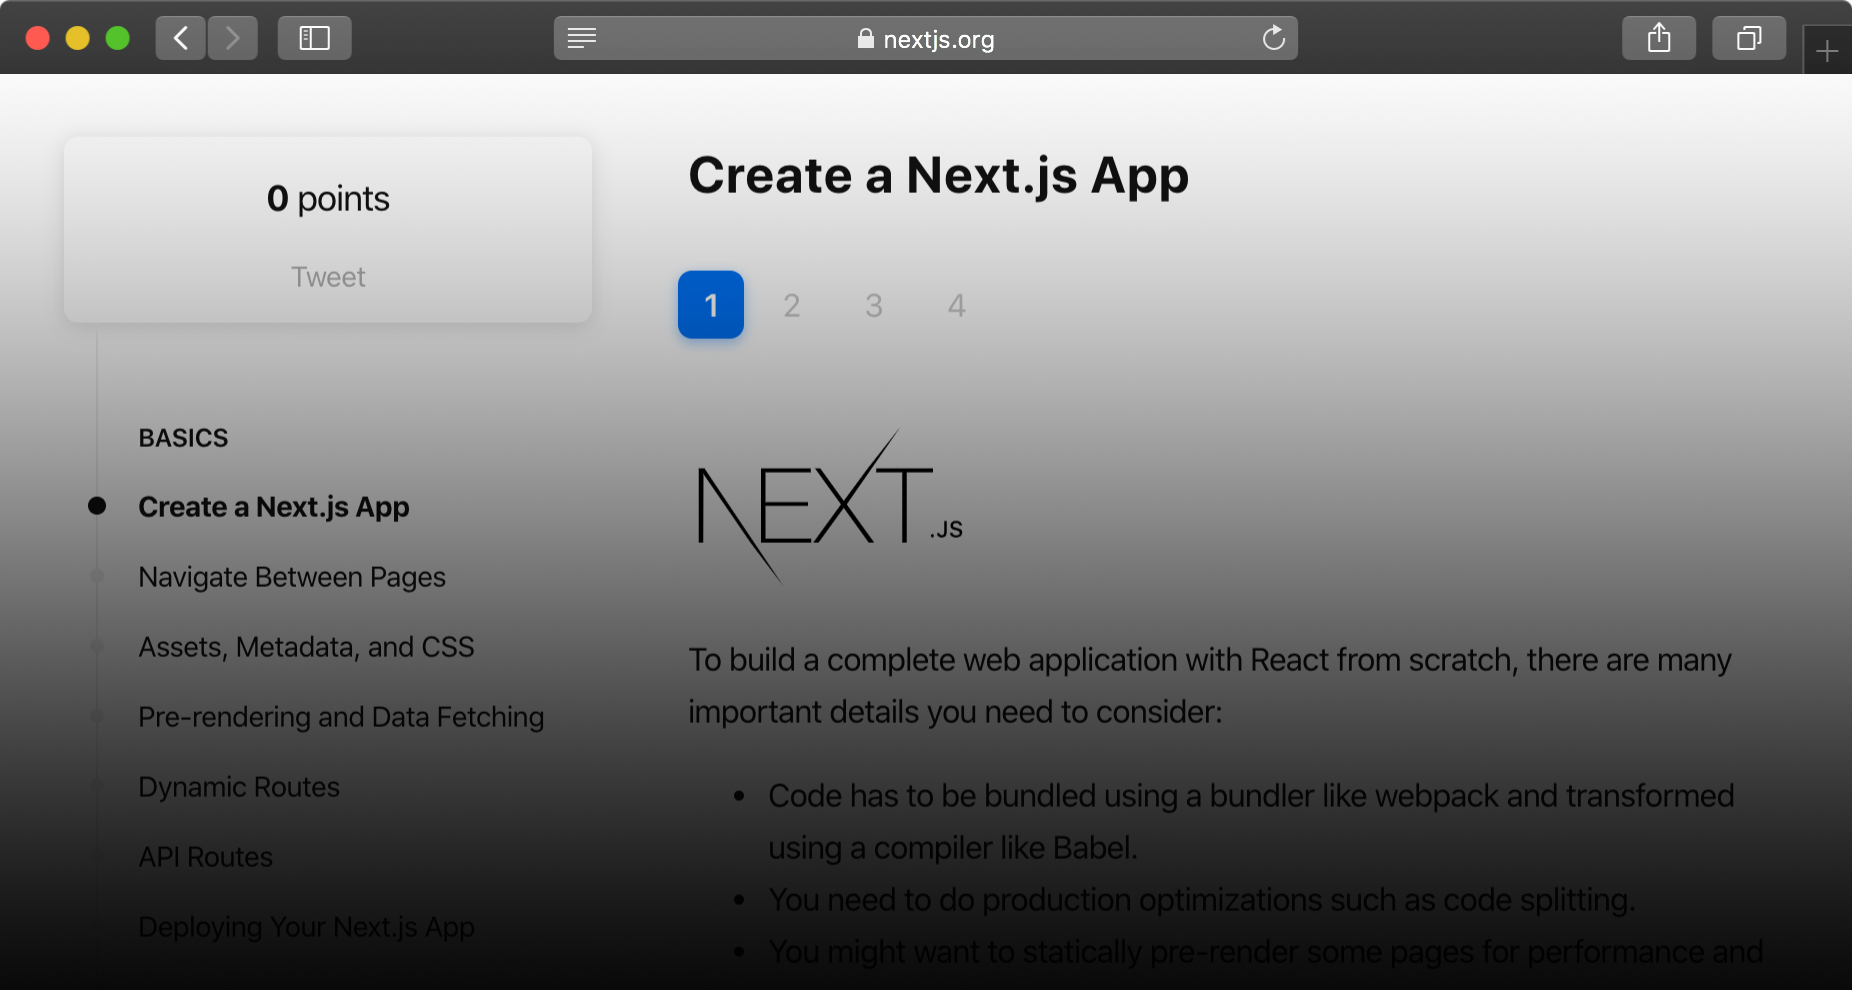
DistFilesfolder tooutsub-folder which is used by Next.js when you do a static export. https://nextjs.org/docs/advanced-features/static-html-export
Setup Static Export and Proxy to .NET APIs
In order to make this Static Export in Next.js we need to make some tweaks to next.config.js.
You can see that we included 3 sections in the config to make it work. Lets check it out.
rewrites, this is the equivalent of the proxy middleware but in Next.js terms, here we have configured a proxy to .NET APIs , make sure to use the correct port for your project and notice that I'm using a prefix/api/in the route so any request path that starts with/api/will be proxied to .NET app.images, this is a tweak required to make anext exportand go around image optimization that is not supported in static export.webpackDevMiddleware, in this case this tweak is for theDevcontainerincluded in the GitHub repository.
Little tweaks to YARN Tasks
The only thing we need to change is the build task in package.json, in this case replacing it with a next build && next export command as you can see below.
.NET Production Static Routes workaround
That would be all if Next.js were not as particular as it is, so lets finish this with a workaround about its static HTML export feature.
So, lets recap our sample, we have two routes that we need to make work:
- /products
- /products/[productId]
For a react.js app in a non-next.js mode, those routes can be activated from the index.html page but that is not the case for a Next.js app. To understand this, let's take a look on the publishing result.
dotnet publish .\net60-react.csproj -c Release
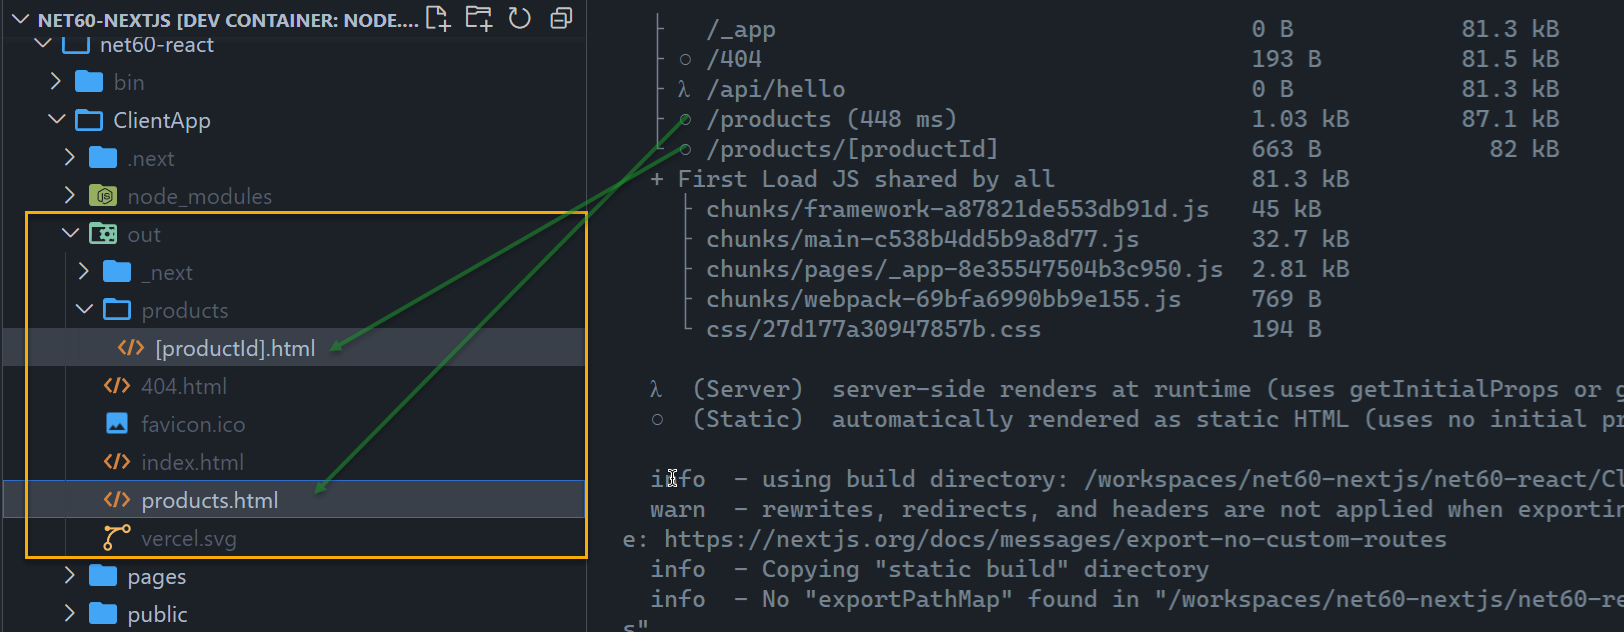
Be aware that this will take some minutes because of its optimizations, but you can see below that it generates two HTML pages for our routes.
- products.html
- [productId].html
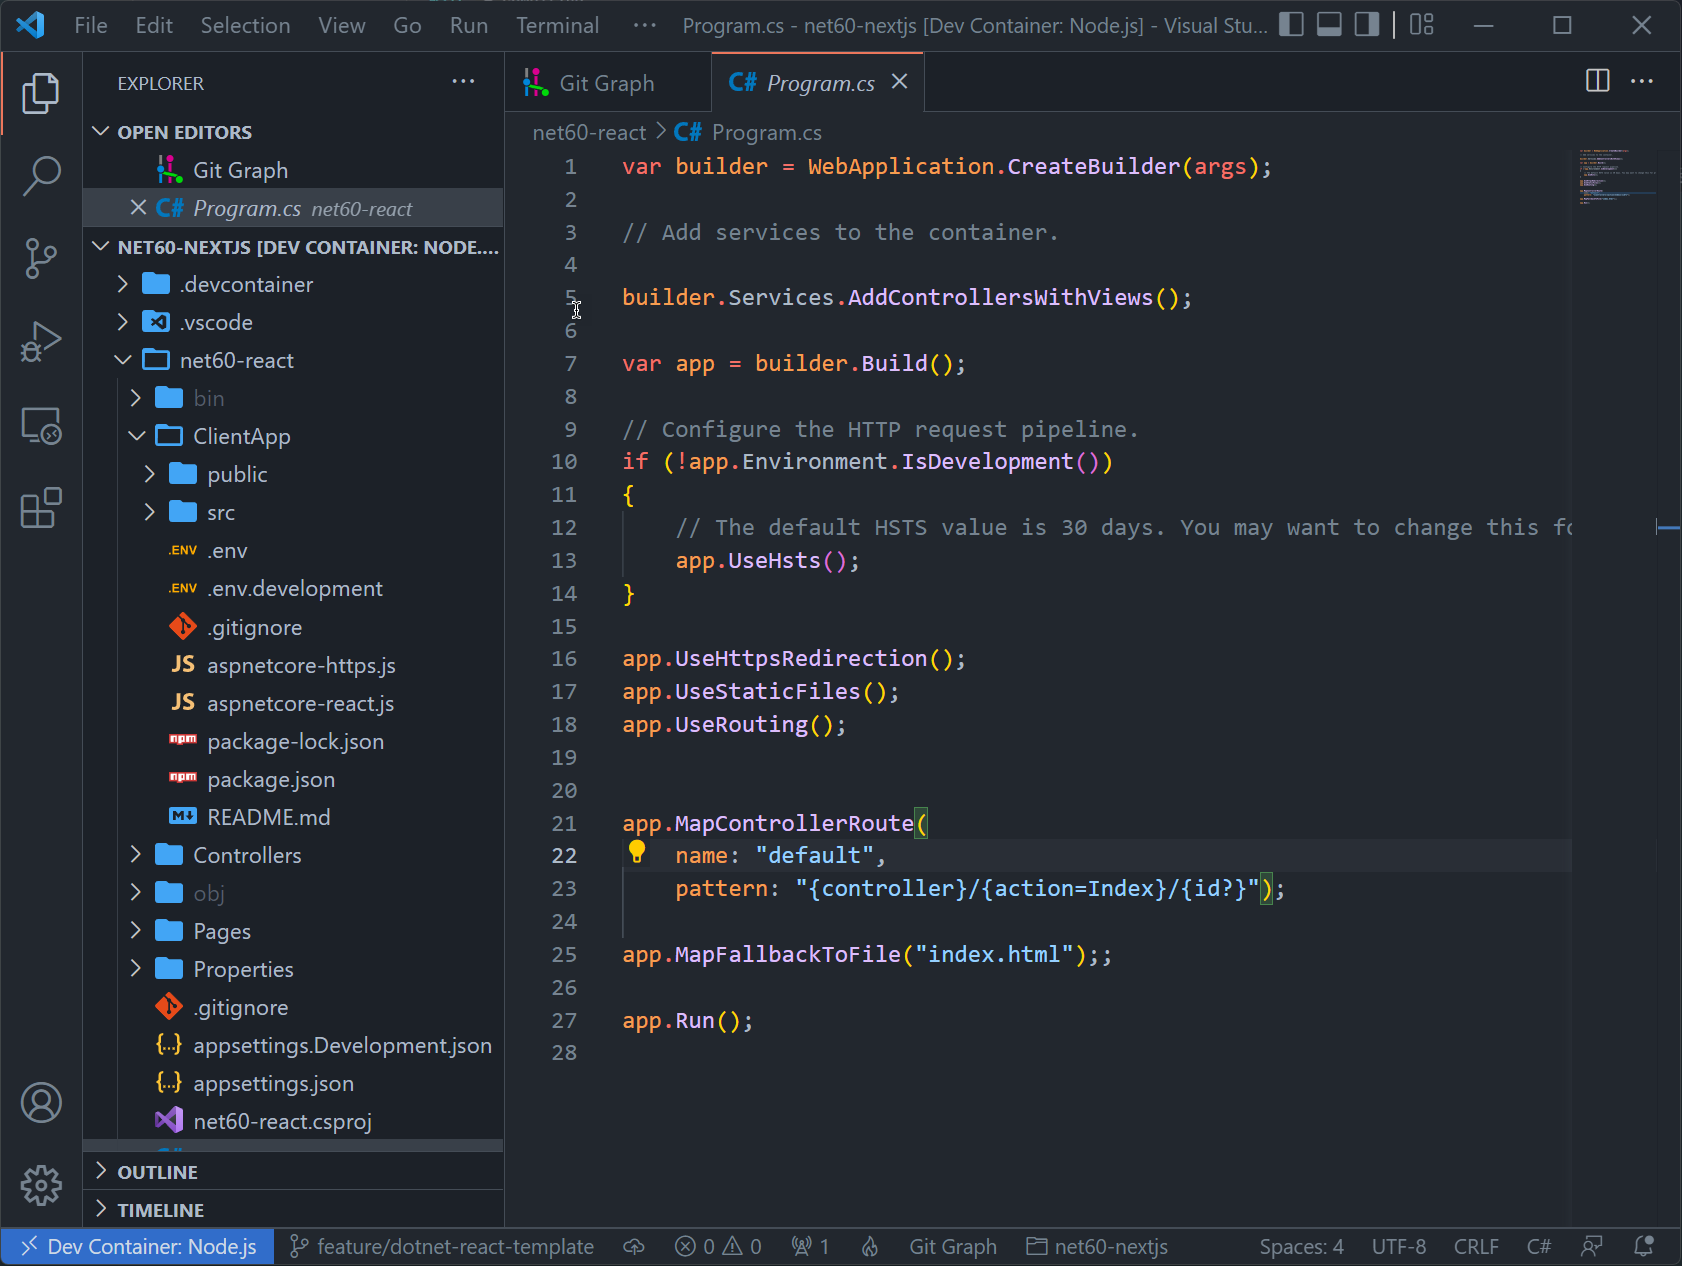
So, in order to make our routes work we need to manually map those in our .NET app using MapFallbackToFile overload that receives a pattern.
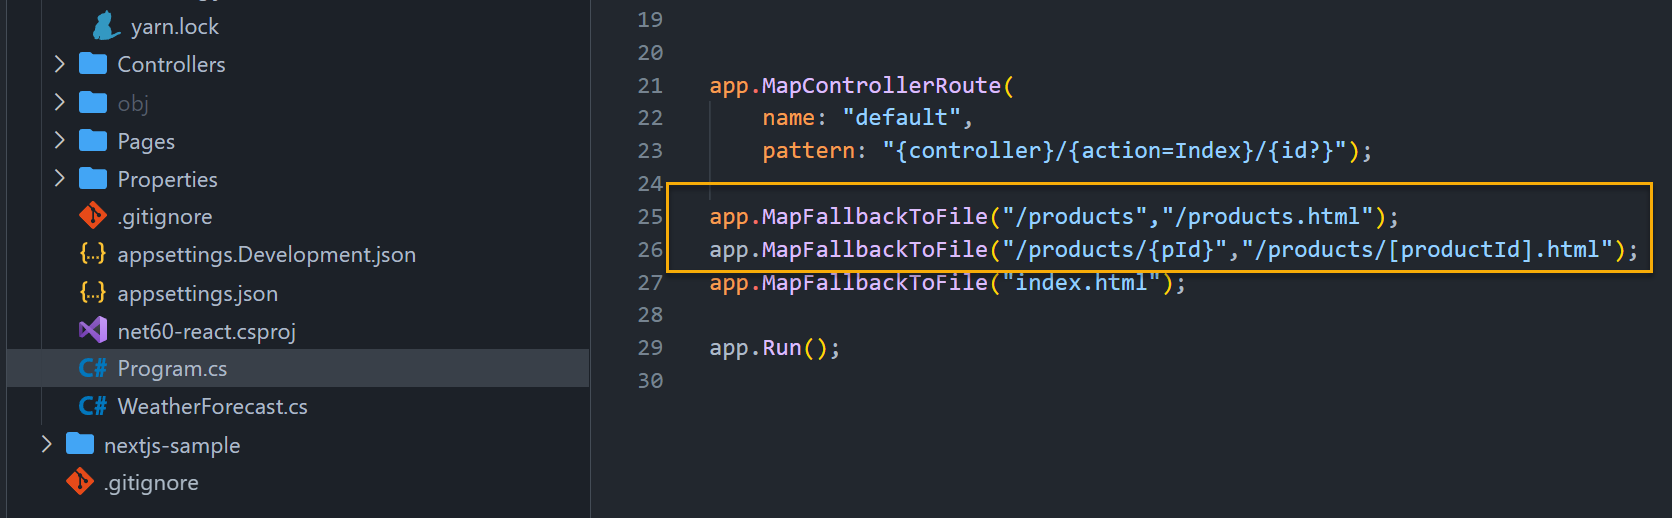
And that is the cherry on top that make this next.js work, it is a little inconvenient but is the only way available so far.
Clarification
- The dynamic routes will work even if you don't set up the additional
MapFallbackFilebut it wont use the precompiled version already generated by Next.js. - You need to remove the
/Page/apifolder included in the Next.js template by default in order to makerewriteswork (because of the same prefix).
Extra: DevContainer included
I've included a DevContainer definition in the repository so you can spin it up from VS Code and have all the dependencies installed and ready to work with.
The webpack config in the next.config.js file is a workaround to make Hot reload work with DevContainers by the way.